Process art can be a fantastic way for kids to explore creativity, as it emphasizes experimentation, exploration, and the joy of making art without worrying about the final product. Wouldn't you agree that the kids have enough to worry about as it is? Here are some child-friendly examples of process art:
- Finger Painting: This classic activity allows kids to explore textures and colors with their hands. The focus is on the sensory experience of spreading and mixing paint rather than creating a specific picture.
- Bubble Wrap Printing: Kids can paint on bubble wrap and then press it onto paper to make prints. The process of applying the paint and pressing the bubble wrap is the fun part, with the added surprise of seeing what patterns emerge.
- Nature Collages: Children can collect leaves, flowers, twigs, and other natural materials during a nature walk and then use them to create collages. The act of gathering materials and arranging them is more important than the final composition.
- Salt Dough Sculptures: Kids can make their own salt dough (a mixture of flour, salt, and water) and shape it into various forms. The process involves mixing, kneading, and shaping the dough, which can be baked and painted if desired.
- Shaving Cream Art: Spraying shaving cream onto a flat surface, adding drops of food coloring, and swirling the colors around with a stick or finger can be a delightful sensory experience. Kids can press paper onto the shaving cream to transfer the patterns they create.
- Drip Painting: Inspired by Jackson Pollock, kids can use spoons or brushes to drip and splatter paint onto a large piece of paper or canvas laid on the ground. The movement and technique are the main focus.
- Ice Cube Painting: Freeze colored water in ice cube trays with popsicle sticks as handles. Once frozen, kids can use the ice cubes to paint on paper. The melting ice creates unique patterns and textures.
- Torn Paper Art: Provide kids with colored paper to tear into pieces and then arrange and glue onto a larger sheet to create abstract designs. The tearing and arranging process can be very engaging.
- Sand Art: Using colored sand, kids can create patterns and designs by layering the sand in containers or gluing it onto paper. The tactile experience of handling the sand is a big part of the activity.
- Blow Painting: Place drops of liquid paint on paper and have kids use straws to blow the paint around, creating interesting and unpredictable patterns. The fun is in seeing how the paint moves and mixes.
My favorite, and one that I teach at my art studio, is alcohol ink framing. This process certainly involves parental supervision. In fact, you may just want to take over step 3 altogether. Here is a break down of the process:
Step 1:
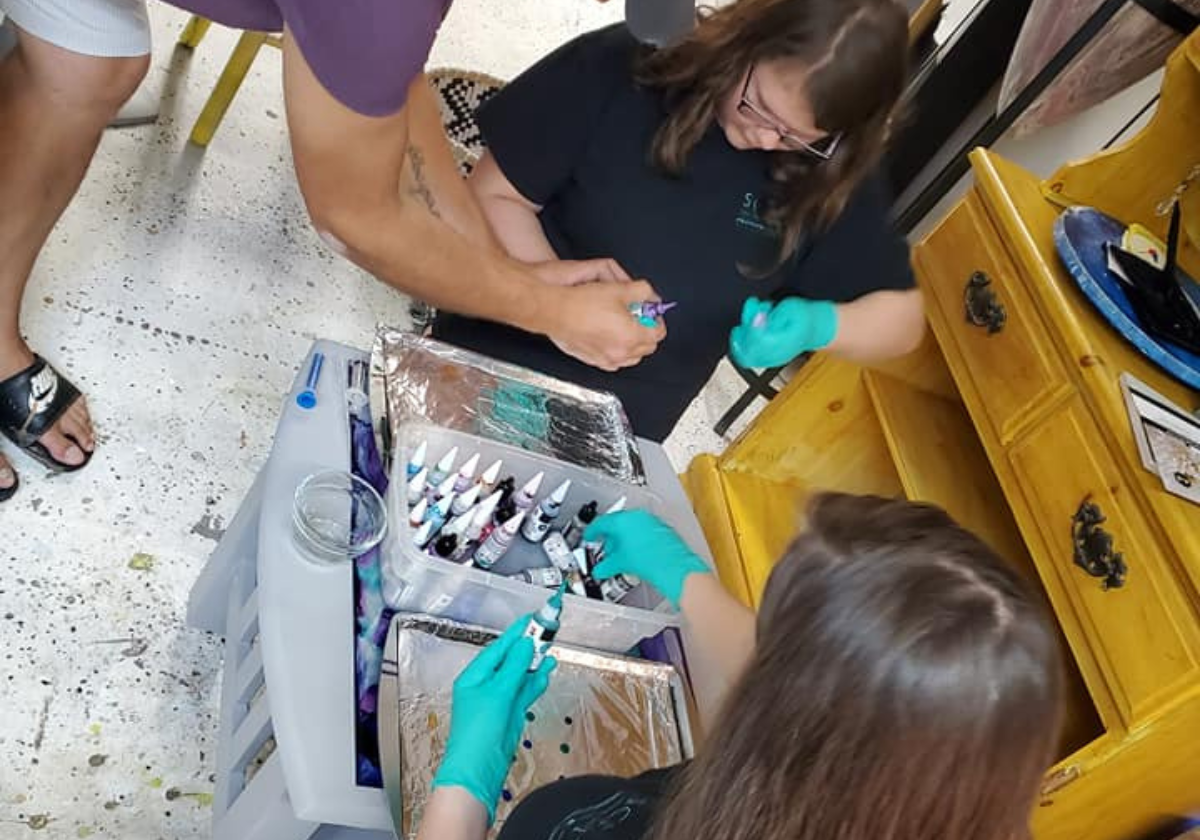
Select your glass surface that you would like to use. In my workshops, we typically use picture frames. Disassemble the frame, removing the glass. Place all other items to the side, you will reuse them. Once you've selected your frame and have taken it apart, you select what colors of alcohol ink you would like to use. My go to is Tim Holtz brand Alcohol Ink, but there are many great choices out there. I suggest no more than 3 or 4 colors, or you will muddy up your project. Take each color and place small drops all over your surface. You will do this for each color you have selected.
Step 2:
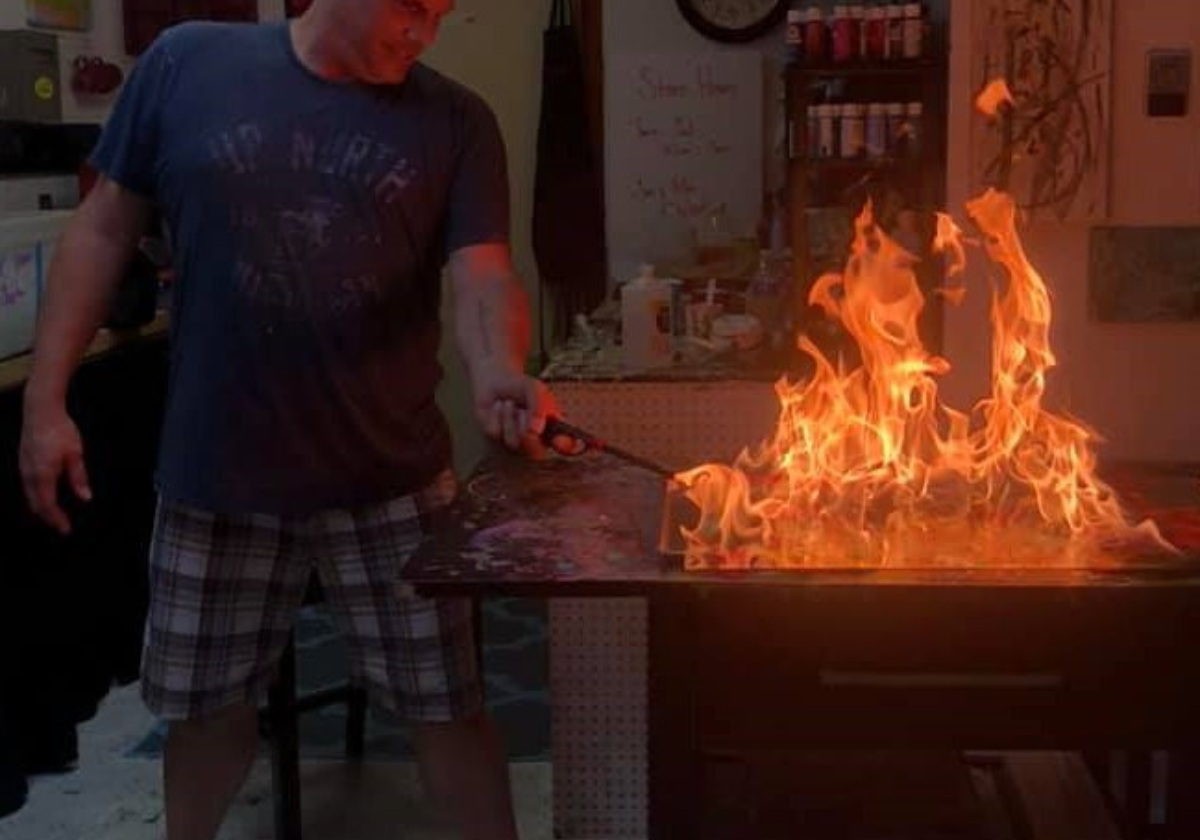
Now, using a droplet or dauber, you will put rubbing alcohol over top of the areas that your just placed color. It is important to remember 2 things in the step. 1. You must always use 91% rubbing alcohol in order for this process to work. 2. Less is more! Understand that the rubbing alcohol expands as it evaporates. Here comes the most important step. Once you have dropped the rubbing alcohol on the ink, you have to start it on fire. I suggest that Parents do this step obviously or you could bring the little down to my art studio and I can show them how this is done. Yeah, I like that idea. Stay tuned for a special offer!
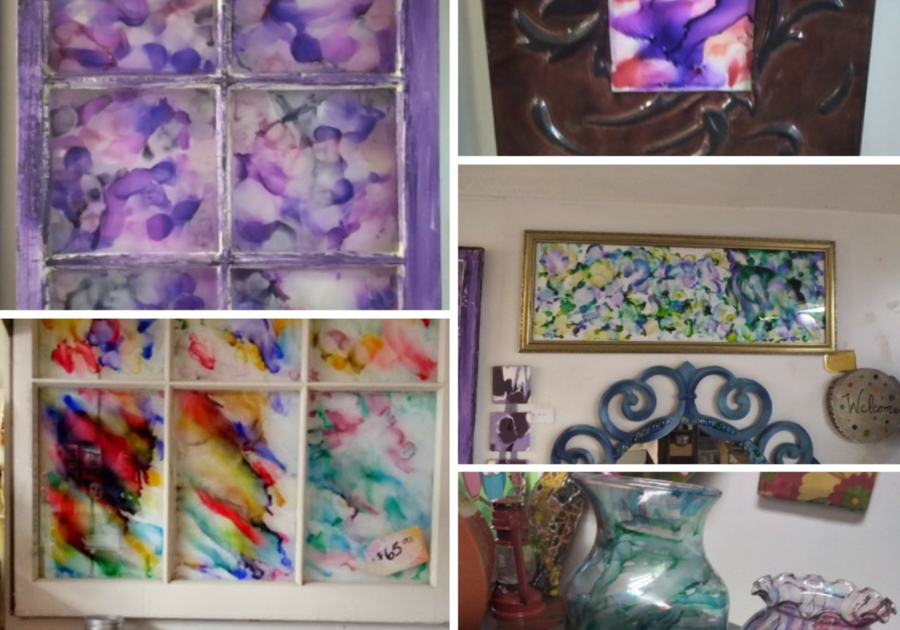
Once your glass is cool enough to handle, you will now put your picture frame back together. I like to add some patterned paper, along with some embellishments just to give it an even more unique look. The photo at the beginning of the article.. that is your finished project. You've just produced a piece of process art!
These fore mentioned activities focus on the creative process and allow children to explore materials and techniques freely, fostering their imagination and creativity without the pressure to produce a specific outcome.